
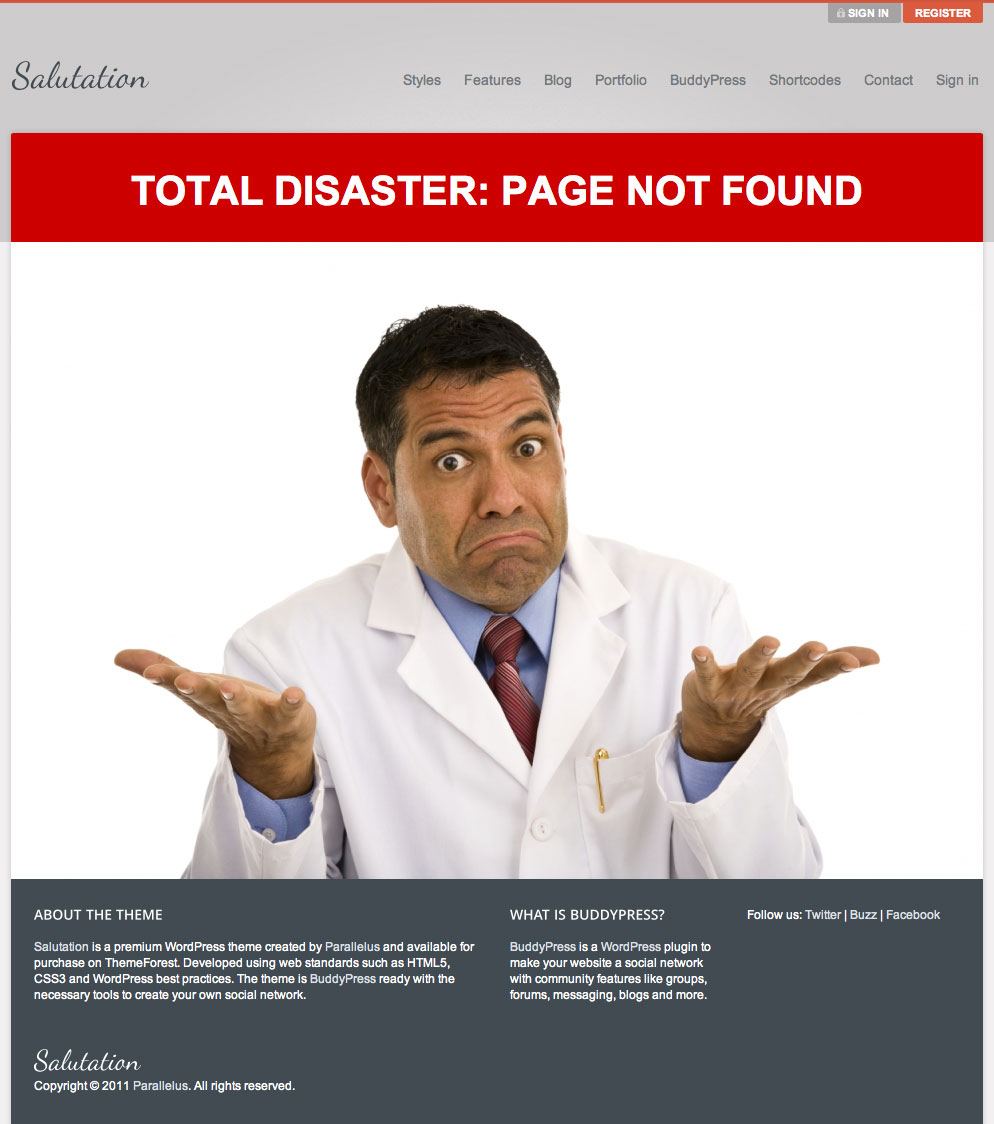
I am talking about the so-called “error page” that deals with the 404 Not Found server response.
The truth is that we don’t actually have to do anything because technically the server response itself is enough to deal with the situation. So we are talking aesthetics here, please don’t get it into your head that you absolutely must develop a customised error page, it’s just something that can add polish and professionalism to your web site. And the great thing is that the theme we are using enables us to very easily produce a highly customised error page.
There are actually a couple of ways to do this and I am going to show you my favourite way. It’s a three step process:
- Create the components.
- Create the page layout.
- Launch the error page.
Before I start I just want to mention that writing about this, even reading about this, takes far longer than actually doing it so don’t be put off by the length of this article – step-by-step tutorials always tend to have a lengthy appearance, it’s just the way it works. And then of course you have to make allowances for me going off on tangents and wittering on like this. Bottom line? You can create a generic custom error page in the way that I am going to describe in under five minutes.
1. Create the components
The components of our error page will comprise three basic areas: header, content area, footer. Later we will bring these components together into a page layout, but before we can do this we need to actually have the components in place.
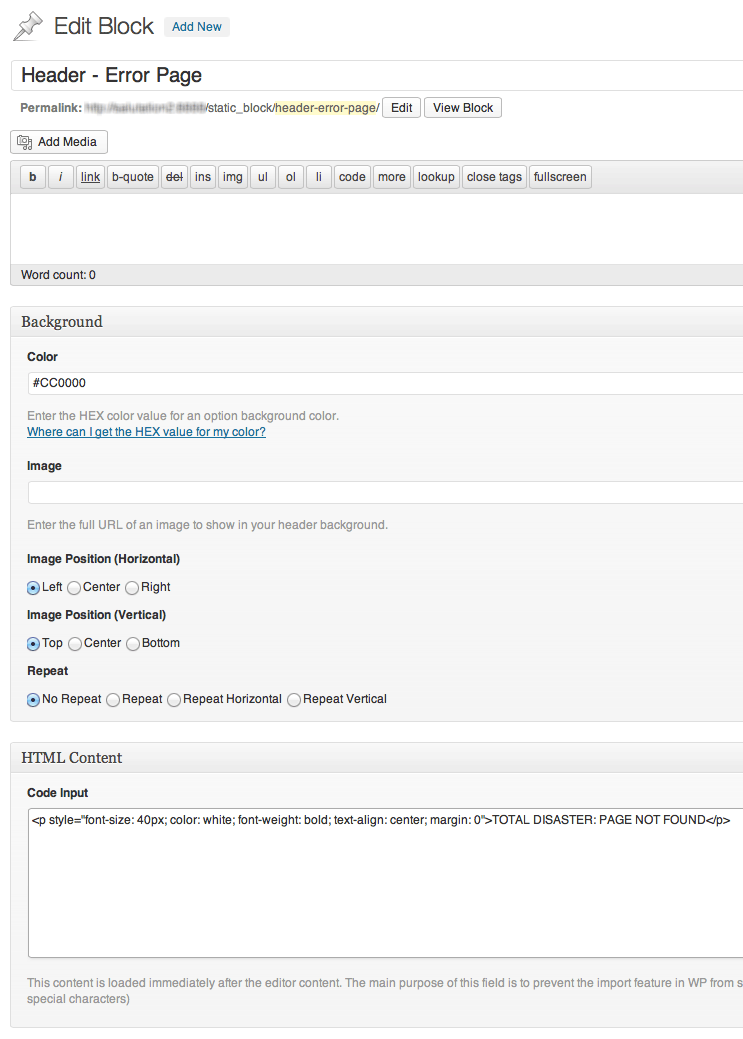
So our first job is to go to Static Content > Add New to make our different and distinctive header.
Let’s call our header “Header – Error Page”, and for the moment we’ll do something quick so that when we are testing what we have done we can see that it is working. In the Background metabox set the Color to “#CC0000″ and down below in the HTML Content box add this:
<p style="font-size: 40px; color: white; font-weight: bold; text-align: center; margin: 0">TOTAL DISASTER: PAGE NOT FOUND</p>That will do for now so click the Publish button. You can come back here later and do a proper design job for this header.
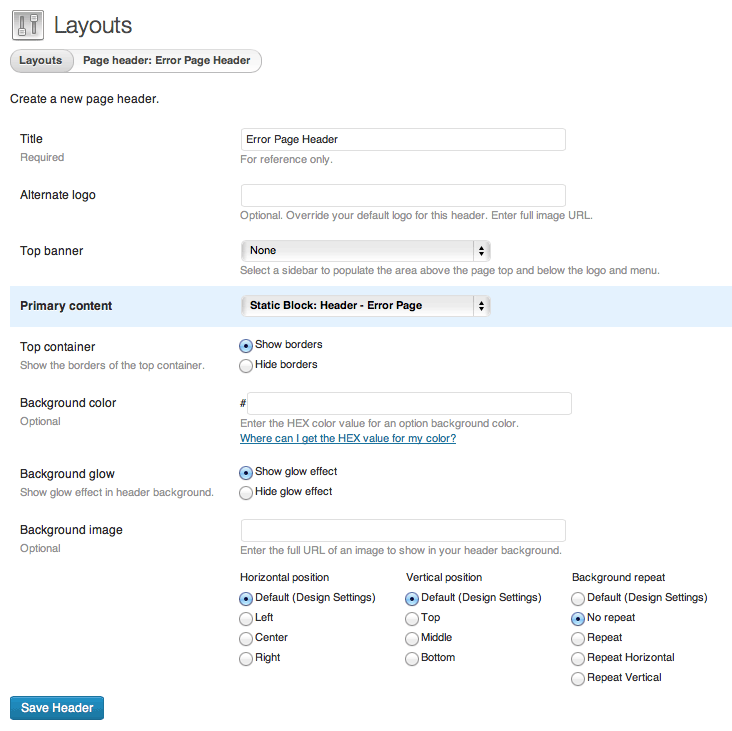
For the Title let’s use “Error Page Header” and for the Primary content use the drop-down menu to select “Static Block: Header – Error Page”.
The rest of the page header settings we can leave at their defaults but you may want to adjust one or more of them to suit your requirements or to match the headers on the rest of your web pages. That’s completely up to you. When you are finished doing your thing click the Save Header button to return to the Appearance > Layouts page.
With our error page header completed it’s time to put our Designer hats back on. Do we want a special footer for the error page? I say no. What say you? You say no too? Good decision. Our footer should already have in it a range of messages, links and options that remain constant right across our web site. This helps to make visitors feel comfortable because no matter what page they are viewing they know they can look in the footer to see something familiar that reassures them they are still on the same web site.
So no special footer, but we do want special content so that is our next job.
In your admin dashboard click Pages > Add New, name our new page “Page not found” and in the content area add this:
<p>This is our error page content area.</p>
Note that I always use the WordPress Text editor – what used be known prior to WordPress 3.5 as the HTML editor. It’s fine to use the Visual editor if that’s your thing, just remember not to include any HTML in the Visual editor.
Go ahead and click Publish now because we are finished here.
The components for our error page are now all in place so the next step is to bring them all together in a page layout.
2. Create the page layout
In your admin dashboard click on Appearance > Layouts, scroll down that page and underneath the “Layouts” heading click on the Add new Layout button.
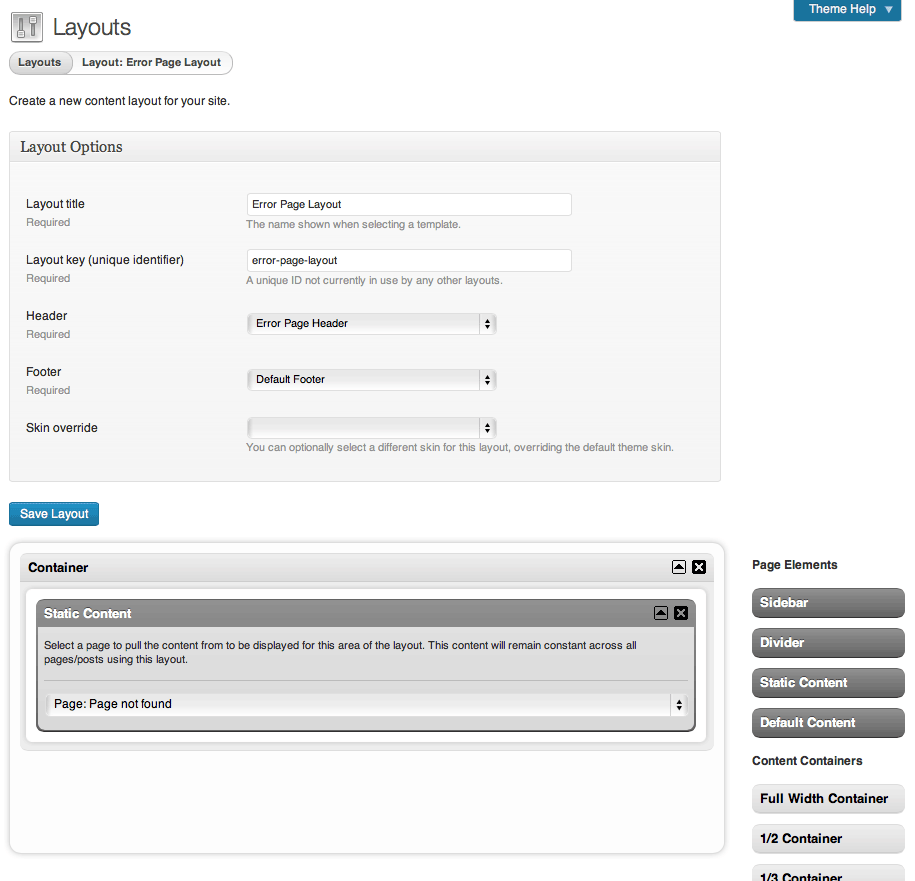
Leave the Skin override blank unless you want to seriously confuse yourself and the visitors to your website.
Down below, drag a Full Width Container into the content area, and then drag a Static Content page element into that container. Set the static content to be “Page: Page not found” – that’s the page that we prepared earlier.
Lastly, click the Save Layout button to return to the Appearance > Layouts page.
Bish bash bosh, done.
3. Launch the error page
Still in Appearance > Layouts scroll down the page, past the “Templates” sub-heading, until on the left you see the Error label.
That’s it. Our custom error page is now active. Go test it.
All that remains is for you to create the actual content for the header and the content area. I can’t teach you how to do that, you’ll need to put on your Designer hats again. ![]()

Resources
- Inspiration: 60 really cool and creative Error 404 pages
- More inspiration: The 100 most funny and unusual Error 404 pages
- Therapy: Five ways to get a life
- Shortcodes: http://para.llel.us/themes/salutation-wp/shortcodes/
- Support forum: http://para.llel.us/support/groups/salutation-wordpress/forum/

