
One-page websites seem to be all the rage these days. The general idea is to have a “landing page” that is a full screen slideshow – i.e. the slideshow fills the entire browser window – and then the rest of the website content is accessed by scrolling the page where you have sections for various topics.
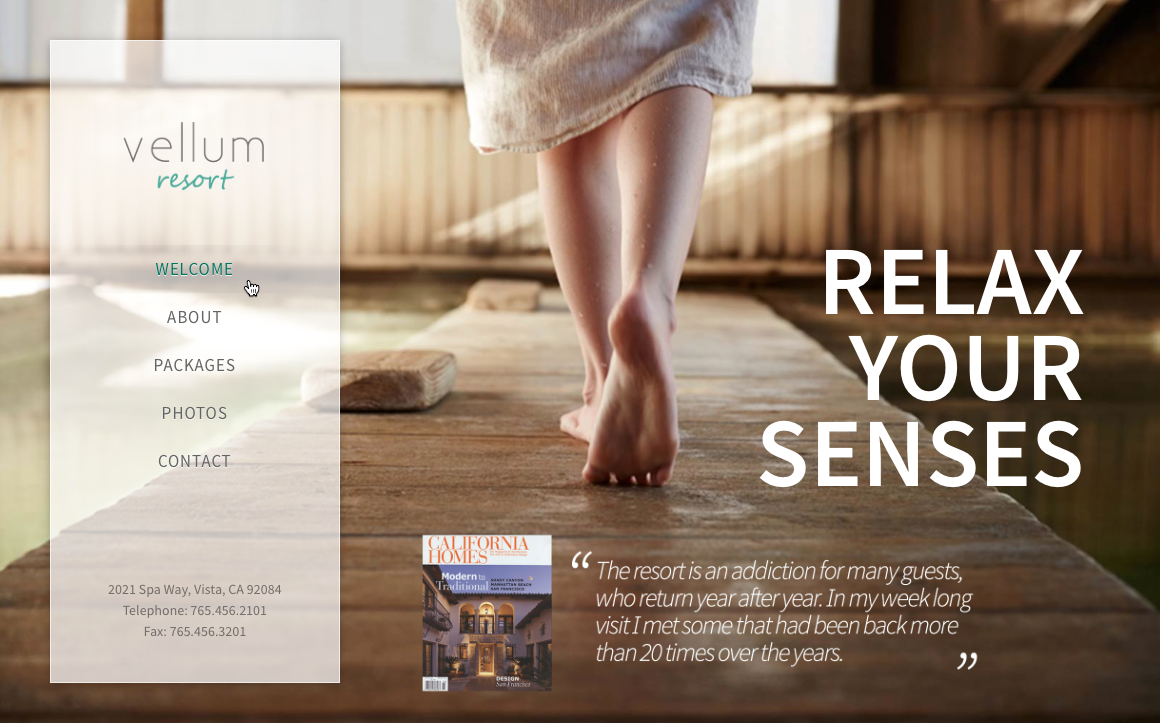
We have a couple of example one-page websites on our Vellum demo website:
Resort page demo → http://demo.vellumwp.com/home-pages/one-page-resort/
Wedding page demo → http://demo.vellumwp.com/home-pages/wedding/
The thing that many beginners to website development don’t understand is how to get a menu item to go to a particular section of the same page when it is clicked.
The simple answer is that we need to add links to our menu which point to anchors on the page.
This is a general HTML thing, the technique has existed since the first days of the internet. In the Vellum theme we have enhanced this technique by adding some smooth scrolling functionality to achieve a fancier appearance. Normally clicking on a menu item would go directly to the appropriate section on the page in an instant, blink and you miss it. In Vellum we’ve added some JavaScript to slow down that change from one section of the page to another with a smooth scroll.
So that’s what this article is about: How to use HTML in our menu and page content to get menu items to scroll to the correct section on the same page.
The first thing is to mark in our content where each section begins. There are three basic techniques we can use to mark the beginning of a section:
- Use an anchor tag with the
nameattribute…
<a name="section_one"></a>
- Assign an ID to any HTML tag by using an
idattribute with it…
<h3 id="section_one">My First Section</h3>
- Actually, this third technique is just another example of the technique above but it is worth illustrating the technique because the “empty div” is basic tool of the trade…
<div id="section_one"></div>
So the three techniques illustrated above all achieve the same thing, they set a marker on the page that we can use in our menu to get a menu item to scroll to that part of the same page when it is clicked. It doesn’t matter which technique you use, each has its merits and its supplementary uses (a discussion of which is beyond the scope of this article). Use whatever technique works best for your situation.
If we are using the Visual Composer plugin to build our article content then we can insert a marker into our content by using a Text Block element or a Raw HTML element.
1. Prepare the content
Create a new page (Pages > Add New), give the page a title and then add a Text Block element to the content. In the editor window click on the Text tab, remove the dummy placeholder text and then paste in this HTML…
<h3 id="section_one">First section</h3>

Click the Save button and that’s the anchor and heading for our first section of content done.
Now click the Add row button to add a new row. We can set a column layout for the row if we like, and then add to it any content we like. If you are unsure what content you want here just add a Text Block with the default placeholder text. You can always come back and change this later.
So when we are finished we will have two rows: the top row contains the anchor and section heading, the second row contains the content for that section.

If you haven’t done so already, publish the page to save the work we have just done. Or save it as a draft if you prefer. Save as you go is a good habit to get into.
Now repeat the procedure as many times as you like, changing the anchor ID and section heading each time. So, for example, the second anchor row will use section_two for the ID, the third will use section_three for the ID, and so on. Here’s the procedure we need to repeat…
- Add a row.
- Add a Text Block to that row.
- Paste in the anchor HTML.
- Save the row.
- Save the article.
- Add a row.
- Set the column layout.
- Add some content to that row.
- Save the row.
- Save the article.
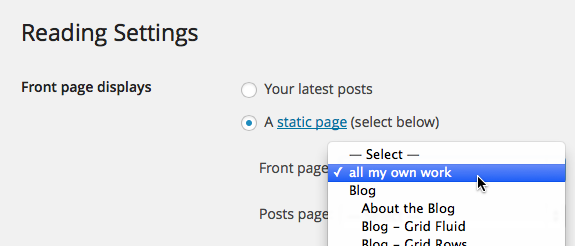
Once our article content is complete we need to make sure that we have set this article to be our static home page.
2. Set the home page
Now we can move on to creating the menu items that will link to our different page sections.
3. Prepare the menu
Go to Appearance > Menu and click the create a new menu link. Give the new menu a unique name and then click the Create Menu button.
Over on the left you should see a Links panel. If you can’t see it then click on Screen Options (top right) and under “Show on screen” enable the Links option.
Open the Links panel and in the URL input box remove anything that is already in there and then add this…
#section_one
That URL links to the ID in our <h3 id="section_one"> HTML.
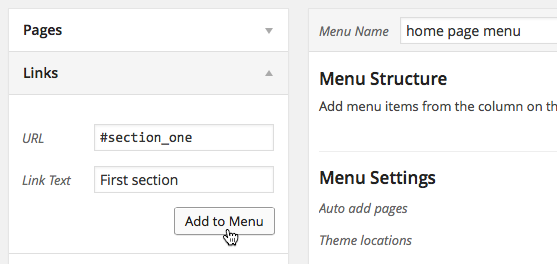
In the Link Text input box add “First section”. That’s the text for our menu item.
Click the Add to Menu button to finish this menu item.
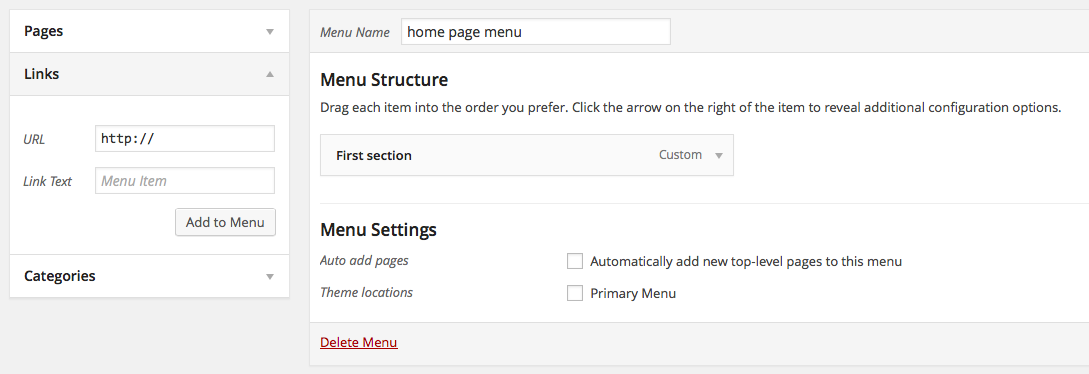
Now repeat that procedure, each time adding the next ID – #section_two, #section_three and so on – and the appropriate text for the menu item. Don’t forget to save the menu as you go, and when you are finished click Save Menu one last time.
So that’s our menu finished. But we need to tell WordPress that this is our primary menu so at the bottom of the menu, underneath the “Menu Settings” heading, enable the Theme locations option to make our menu the primary menu. Don’t forget to click Save Menu again after you do that.

And that’s it, we’re all done. But there is one more thing that we need to keep in mind.
Can we do this on a multi-page website?
If we’ve got a multi-page website then we can still use this technique on our home page, but in order to still take advantage of the slow scroll effect we need to create a second menu with slightly different URLs to use on all other pages except the home page.
So create a new menu and add all the same menu items as we did before, only this time for the URLs add a forward slash before the hash. For example…
/#section_one
So this second menu is an exact duplicate of the primary menu except that each URL begins with a forward slash.
And now we really are all done. Good luck with your website! ![]()
Acknowledgements
This tutorial is based on an original post in the Vellum support forum by Andy Wilkerson.
Resources
- More info: How to Add a Link to a Specific Location in a Post or Page
- Even more info: Let Me Google That For You
- Inspiration: Vellum demo site
- Support forum: http://para.llel.us/support/groups/vellum/forum/
